Fabric Flower Bouquet

Four years ago tomorrow(!) Ryder and I got married. Yay! I didn’t DIY much for our wedding, but I did make our bouquets, boutonnieres, and corsages with fabric flowers. It ended up being a fun but time intensive project (I figure I made around 70 blossoms). Ever since, I’ve had my bouquet sitting around the house. For a while it was in a small vase, but a bouquet designed to be held doesn’t look quite right in a vase.

fabric flower wedding bouquet
The original bouquet

Finally, this past weekend, I dissembled the bouquet, and gave each blossom its own stem, courtesy of the tree in our backyard.

fabric flower blooms
Fabric + stick = flower!

fabric flower bouquet

What do you think? I think I like it!

Posted in home dec | 2 Comments

Woven Tile Coasters

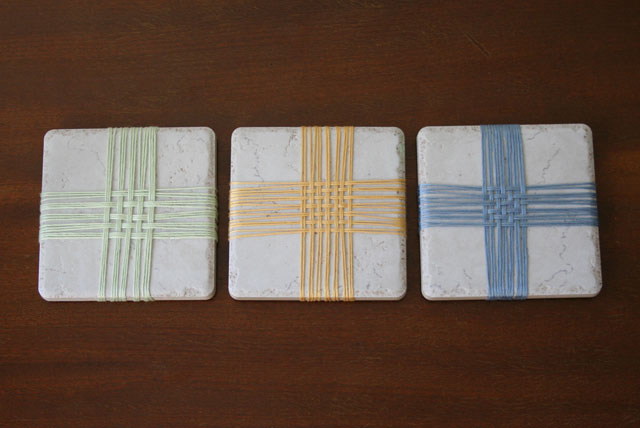
On a recent trip to the library, I was browsing the craft book section (as I tend to do) and picked up Time to Weave. One of the projects suggested weaving with yarn on a tile for wall decor, but I thought it would make a great coaster! I’ve had a stack of 4″ tiles sitting in my craft room for months and months, waiting for me to figure out what to do with them – this is perfect!
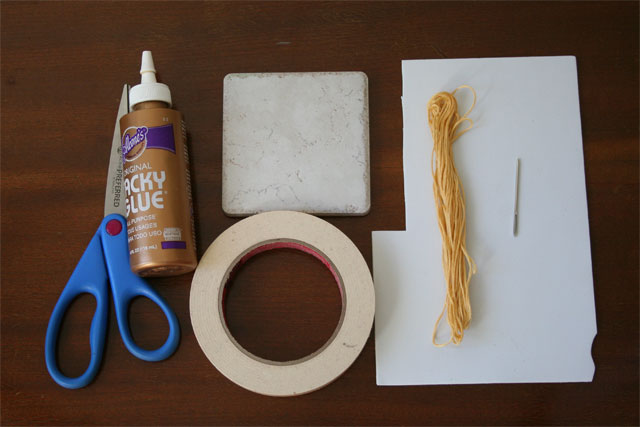
woven-tiles-finished

Supplies:

  • 4″ tiles (I got mine from Home Depot)
  • 1 skein of embroidery floss per tile
  • Yarn or tapestry needle
  • Masking tape
  • Craft foam sheets or cork (to make feet for the coaster)
  • Glue

coaster-supplies

To make:

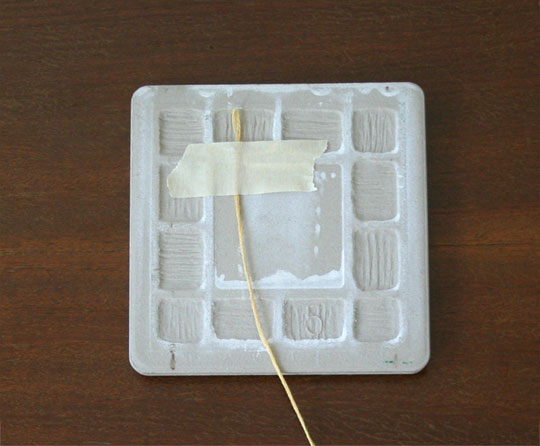
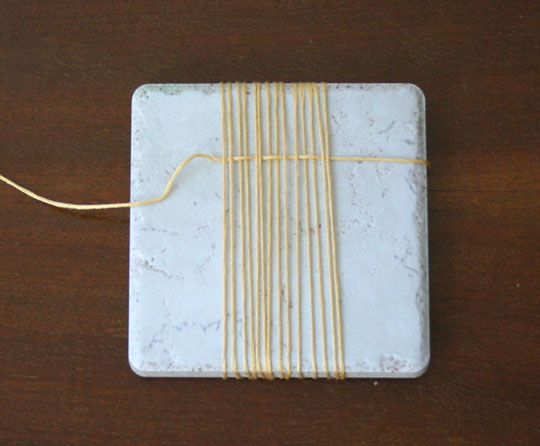
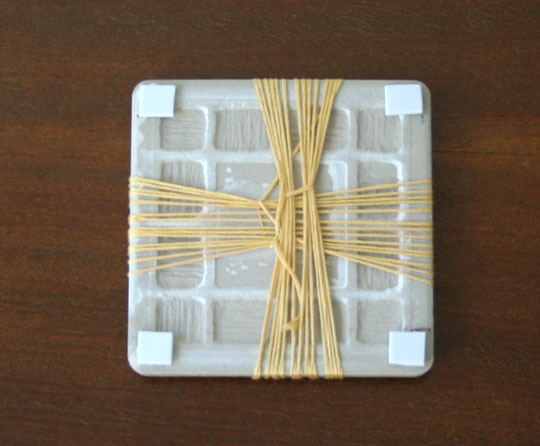
Tape the end of your embroidery floss to the back of a tile.

woven-coaster-1

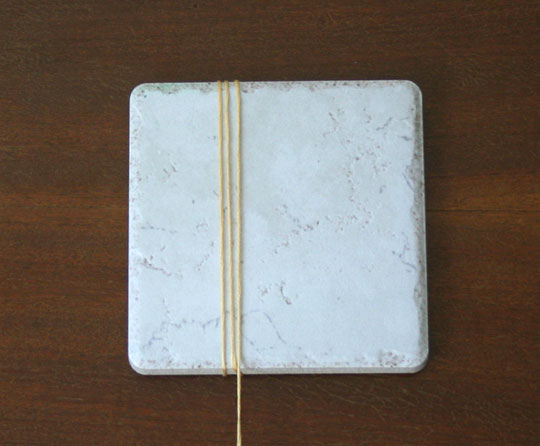
Wrap the floss around the tile 14 times, keeping the lines close together and making sure not to cross the floss as you wrap. You should be wrapping pretty tightly, so the floss is flat against the tile. This is the warp.

woven-coaster-2

Tape the floss on the back of the tile to hold it in place while we weave the weft.

woven-coaster-3

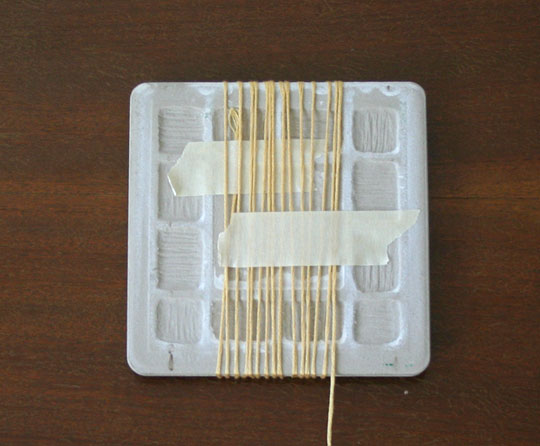
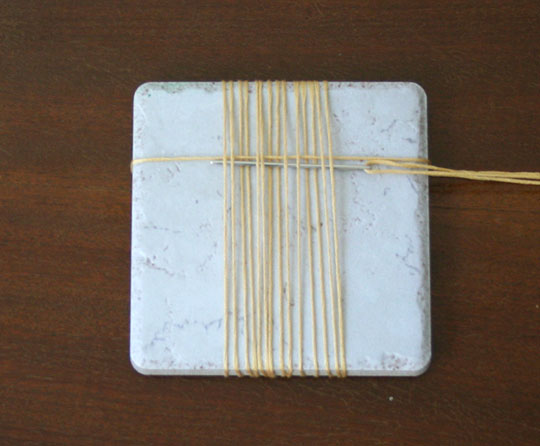
Thread the floss on your needle, and slide the needle under 2 strands of floss, then over 2, under 2, over 2, until you reach the other side.

woven-coaster-4

Pull through, and wrap floss around the back.

woven-coaster-5

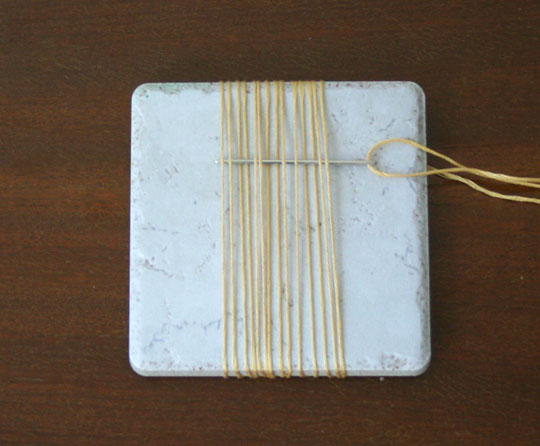
Follow the path of the previous strand – under 2, over 2, under 2, over 2 until the end. Wrap floss around back.

woven-coaster-6

Now pass the needle over 2, then under 2, over 2, under 2 until the end and wrap. Do this twice.

woven-coaster-8

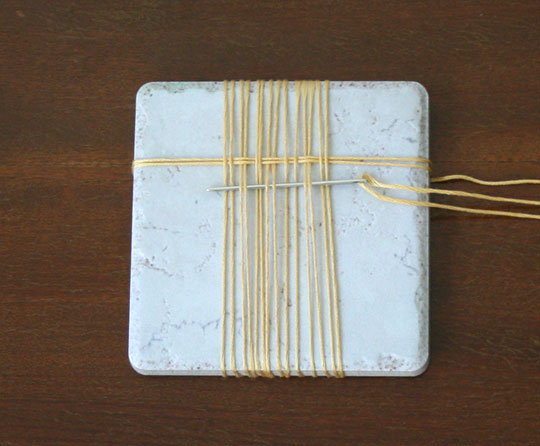
Alternate sets of two strands until you’ve woven 14 strands for the weft.

woven-coaster-12

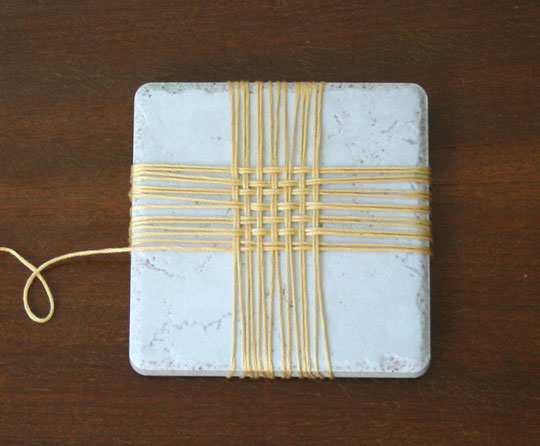
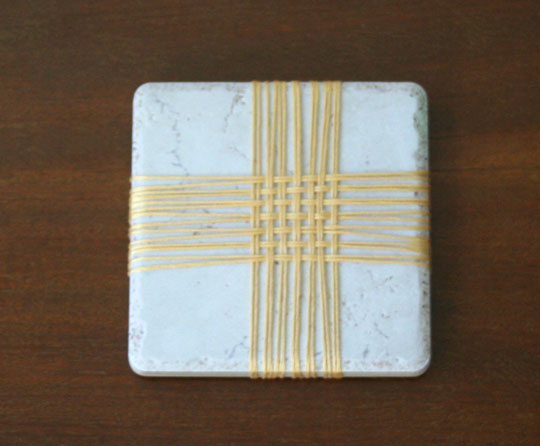
Using the tail of floss, tie a firm knot around the strands on the back of the tile. If desired, remove the tape entirely, making sure the floss is knotted securely. Snip the floss. Cut 4 small squares of craft foam or cork, and glue to the bottom corners of the tile.

woven-coaster-14

Ta-da!

woven-coaster-final

You can try this with any weaving pattern, of course, or try this with different colors for the warp and weft! Let me know if you try this!

Posted in craft, tutorial | Leave a comment

A summer hat

It’s the first day of summer! And I just finished my first knitted hat! Made of wool… Hmm…

Hurricane Hat

This was my first project on circular needles, started a few months ago with my yarn-mentor/work-crafting-buddy.

Hurricane Hat

I think this was a good learning project – the pattern was really easy, but it’s still interesting to look at. Now I just need to go somewhere cold enough to wear this!

Posted in Knitting | Leave a comment

Summer Sewing: Sorbetto Tops

I was feeling kind of blah about my selection of summer tops, so I decided to go shopping. Let me preface this by telling you I am not much of a shopper. I go when I have to, and occasionally when I’m in the mood, but it’s never really “fun” for me. However, I was optimistic I’d be able to check out a store or two, and get a couple of cute new summer tops. Maybe you can guess where this is going… I was sorely disappointed. There were only a few shirts I even halfway liked, and of those, only one fit well enough for me to buy it. Bah. So much for getting new summer shirts the easy way.

Sorbetto top

Time to sew my own! I have a couple dolman-sleeve tops from last summer, but I didn’t really feel like making more of those, so after a bit of internet-browsing, I came across the (free) Sorbetto Top pattern.

Sorbetto top

I had picked up a random bit of polyester something or other a few weeks ago, which became my test version.

Sorbetto top

After fitting the bodice, I tried out adding sleeves (against my better judgement). It worked okay, but this pattern isn’t designed for sleeves – the cut is of a tank top, not a sleeved shirt, so it’s a bit awkward. Fortunately, the fabric choice pretty much conceals the seams and so it looks fine.

Sorbetto top

For my “real” Sorbetto, I used Amy Butler’s Cameo voile that I had been hoarding for a year or so. This fabric is so soft; I love it.

Sorbetto top

I did make a couple of modifications to the pattern – I lengthened the bottom hem, lengthened the shoulders by a bit (about .25″), and shortened the darts. Overall, this is a really cute pattern and quick to make once you have the pattern assembled. I wasn’t sure if I would like the bias tape edging, but I’m really happy with how it turned out!

Sorbetto top

Posted in clothing | Leave a comment

Ornithological Cross-Stitch: the Cedar Waxwing

My favorite section of used book stores (well, any book store really…) is the one full of old, random craft books. I recently found Birds and Animals in Cross-Stitch – a book of birds, butterflies, and the assorted mammal (including a koala).

IMG_4594

My in-laws are avid bird-watchers, so I thought they would like a rendition of this cedar waxwing.

IMG_4591

I framed it in a traditional wooden frame to lend to its ornithological feeling.

IMG_4593

What do you think? I’m inspired to find more life-like cross-stitch patterns; perhaps a set of mounted butterflies next?

Posted in embroidery | Leave a comment

Finished: Cotton Rug

Months ago, I told you about the cotton rug I had started braiding, then pulled apart and restarted with crochet. Shortly after that post, I ran out of colored sheets to use for “yarn” and was left with only neutrals. I wasn’t happy with how the colors were working out, since the center was mostly blues and greens, and the outer rings were going to end up being all white or nearly white. So it sat on the floor of our bedroom for months, being a bit too small, and still attached to the ball of the white-ish sheet I had been using.

cotten crochet rug

Finally, this past weekend, I undid the last three colors, all the way back to the blue paisley ring. Starting with one of my neutrals, I crocheted that until it was almost gone, then did a ring of blue/green/yellow plaid, followed by my second neutral. To finish it, I did one ring of green gingham.

cotten crochet rug

I’m much happier with this color layout, and the rug finished at just over 3′ x 2′, which is a decent size for the patch of bare floor in our bedroom.

cotten crochet rug

If I could only find a cheaper source for sheets, I would make a gigantic crochet rug like this for our living room. Alas, the best I’ve been able to find is the occasional $5 sheet at the Goodwill near me (and usually they’re closer to $10 each). I have a hard time spending $10 for a sheet I’m just going to rip up… any other ideas for sources of cheap cotton?

cotten crochet rug

Posted in craft, finished | Leave a comment

Shelves for the kitchen

Our new apartment is somewhat… limited… in terms of cabinets and counter space. Half of our kitchen is taken up by appliances, and our “pantry” had been this cluttered table in the corner where a dining room table would have gone, if the owner hadn’t added a washer and dryer to the kitchen, leaving no room for a table if chairs were also involved. (we are very thankful for the washer and dryer, however)

IMG_2723

So for Ryder’s birthday my parents bought us some wood, and my dad helped us plan out some long shelves under this window, to replace the table which was pretty much always messy.

IMG_3788

The shelves are 6′ long with simple 2x4s for the vertical supports.

IMG_3794

With these new shelves, we finally have a place to put all our snack food, a nice home for the microwave, and even a handy corner for the dust-buster. Hooray!

IMG_3795

Posted in wood | Leave a comment

A very ferocious (knitted) bee

Recently, I was browsing a bookstore near our house and saw a very cute knitting book, Super Scary Mochimochi. I promptly bought it, my very first knitting book.

knitted killer bee

Ryder suggested this as my first project: a Killer Bee. I have to say… it’s pretty adorably ferocious, with its tiny little sword and drooping antenna.

IMG_3816

This was also a good learning project: I learned how to knit stripes, and that stripes knitted in the round are, by default, ugly:

ugly jogged knitting stripes

And then I discovered jogless stripes, which convinced me to take apart the bee and do it over, this time joglessly. Now you can’t even see where I changed colors!

Next up from the book: the Hurly-Burly.

Posted in Knitting | 5 Comments

This & that

IMG_3307
Working a bit on a light, lacy scarf-that-won’t-be-a-scarf-because-I-don’t-have-enough-yarn

IMG_3327
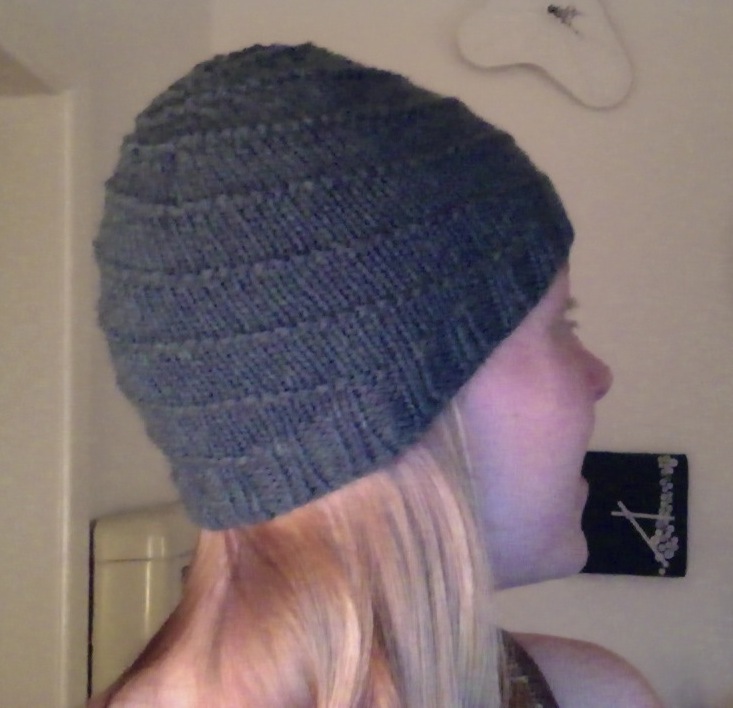
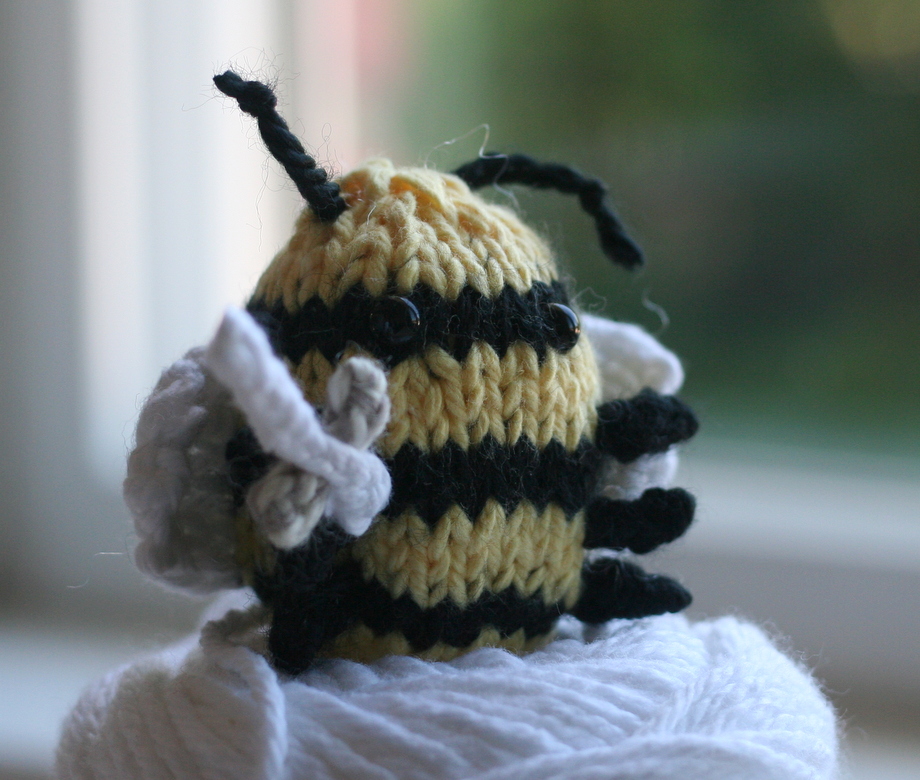
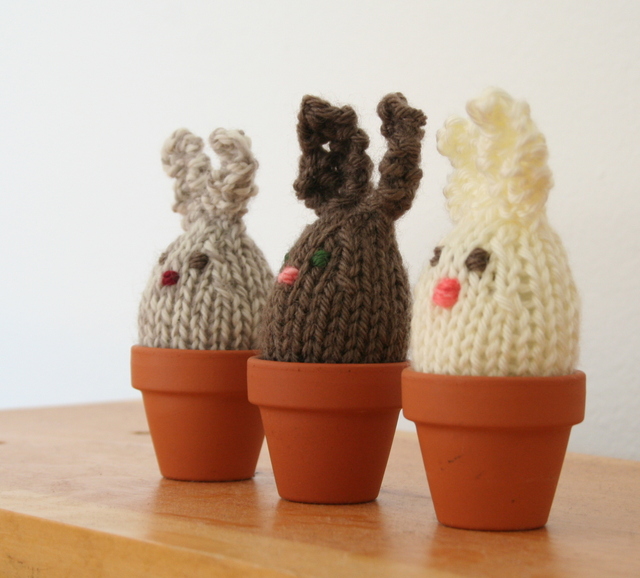
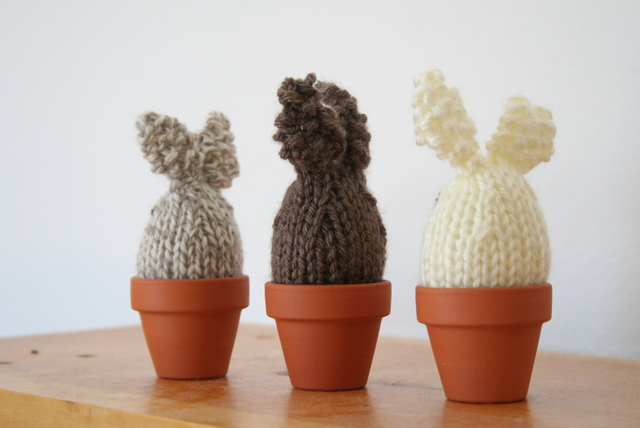
Having fun with double pointed needles

IMG_3337
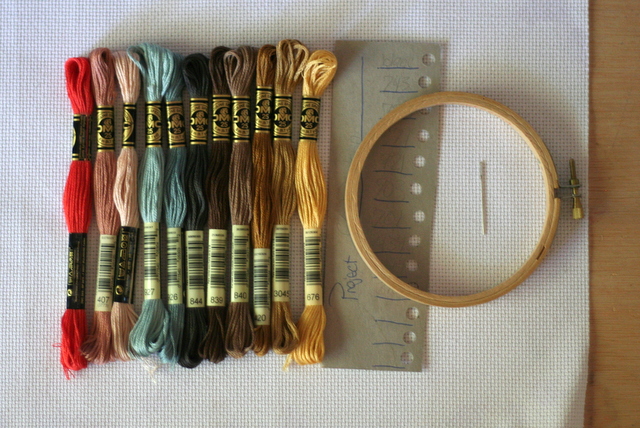
Reviving an old pastime thanks to a bookstore find

What are you working on?

Posted in in progress, Knitting | Leave a comment

The cutest bunny

After my successful first foray into knitting, I wanted to learn how to knit in the round so I could make cute tiny things. My knitting friend suggested the hurricane hat as a good starting place for learning, so I purchased circular needles and double pointed needles, plus some new yarn. Well, the start of our knit-a-long got delayed by too-much-work-to-do (imagine that), but I wanted to try out knitting in the round anyway.

knit bunny

I wanted something that would be relatively quick, and not too complicated. I found this adorable bunny pattern that seemed to fit the bill.

knit bunny

It was designed to hold a cadbury creme egg, but alas, there are none of those to be found in my house right now, so I stuffed it with polyfil and sewed the bottom shut instead.

knit bunny

This was a really great project to learn on. It was small enough that it knit up in an evening, and I wasn’t too invested in it if I messed up. It also gave me the chance to practice increases and decreases, plus, of course, knitting in the round.

knit bunny

And to top it all off, it’s totally adorable. I think I was literally squealing with excitement when I finished it and saw just how cute it was.

IMG_3290

And of course, I couldn’t stop at just one.

IMG_3295

IMG_3300

See all the details on my ravelry project page, and maybe knit one for Easter! (another adorable Easter project would be this reversible duck-to-bunny – how awesome is that?!)

Posted in Knitting | 2 Comments